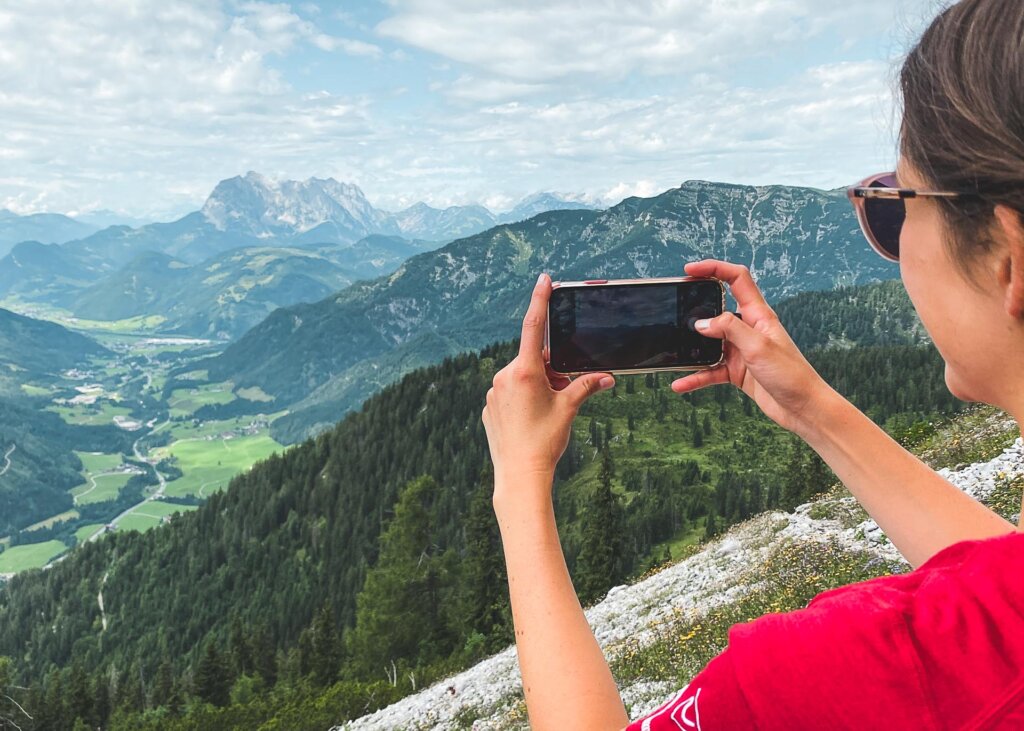

Do you also like to take pictures with your smartphone while hiking to capture the most beautiful views and moments of summit happiness forever? Would you like to give your pictures even more of a “wow effect”? Then you’ve come to the right place. Thanks to the new smartphone cameras, you don’t have to lug around heavy photo equipment or lenses, and taking pictures becomes a breeze. To make your smartphone pictures look as professional as possible, it takes some practice and the right know-how. We have summarized the best 20 tips for taking better mountain pictures with your smartphone.
#1: PORTRAIT OR LANDSCAPE FORMAT?
On a hike with a great view, most subjects with a view look better in landscape format, because you can see more of the beautiful landscape that way. But before you turn your phone, think about what you’re taking the photo for. If you want to print the pictures or send them digitally to friends and family, then the landscape format is of course suitable. But if you want to post the pictures on Instagram, we would definitely recommend the portrait format.
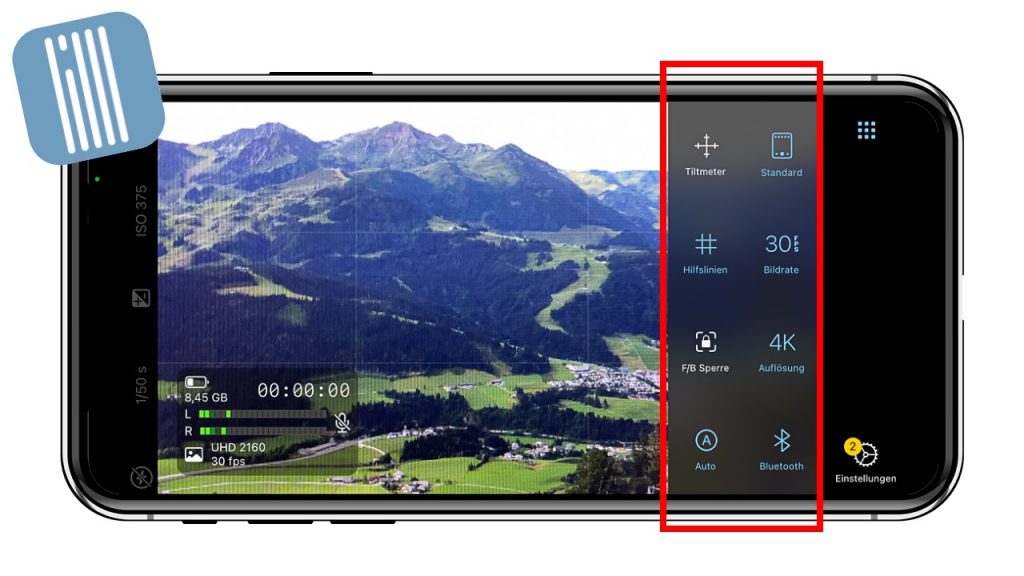
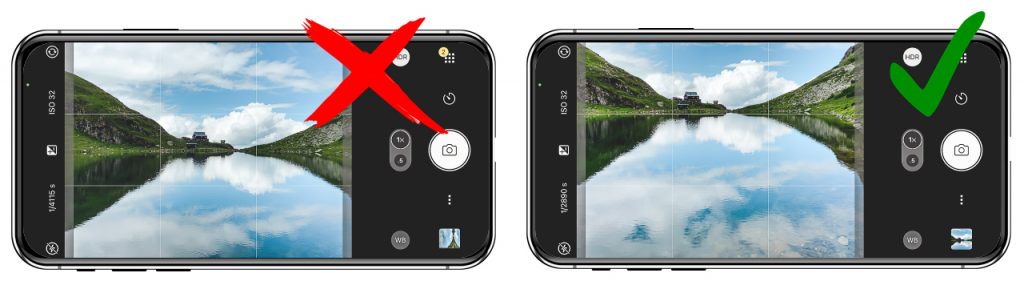
#2: USE SETTINGS IN THE MOBILE APP
The be-all and end-all of photography – no matter what camera you use – is getting to grips with the settings options. Smartphone cameras usually automatically regulate the brightness setting through artificial intelligence (AI) and the focus can also be moved via the touchscreen. It is best to click through all the setting options so that you know where you can change the resolution of the pictures, insert guides or create panoramic shots, for example.
Tip: Especially in the normal camera app of the iPhones, there are few manual setting options. Some of them can only be changed via “Settings -> Camera”. For more settings, you have to download another camera app. We can recommend ProCamera (open in the AppStore).
#3: SHOOT WITH FOREGROUND AND DEPTH OF FIELD
Often a subject works better if you put something in the foreground. This can be a person, a rock, or a flower. However, this foreground subject should only serve as an accessory. You can manually adjust the focus on the screen so that it remains on the landscape in the background. In our case, this made the flower in the foreground slightly out of focus, which immediately makes the image look exciting to the viewer.
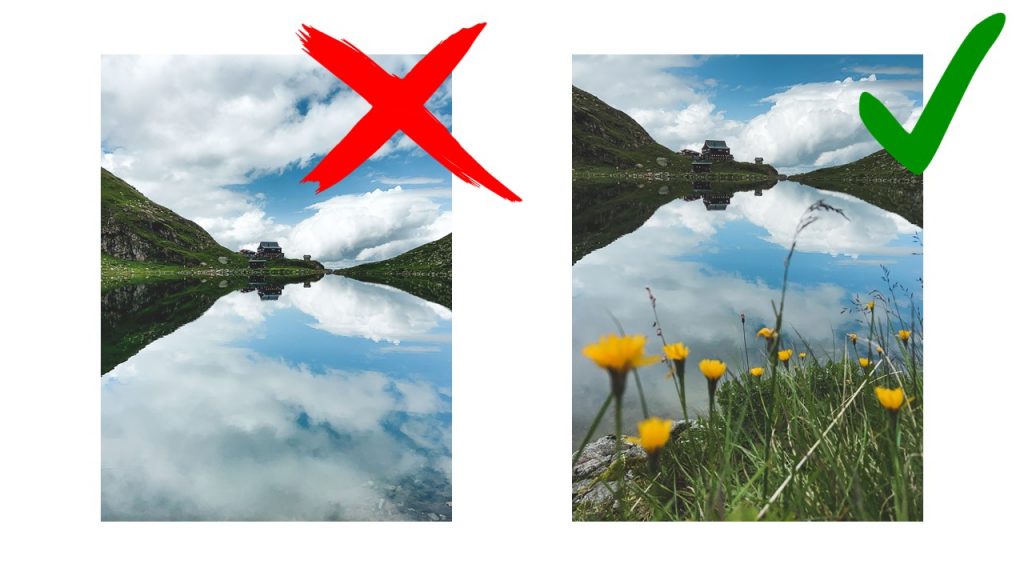
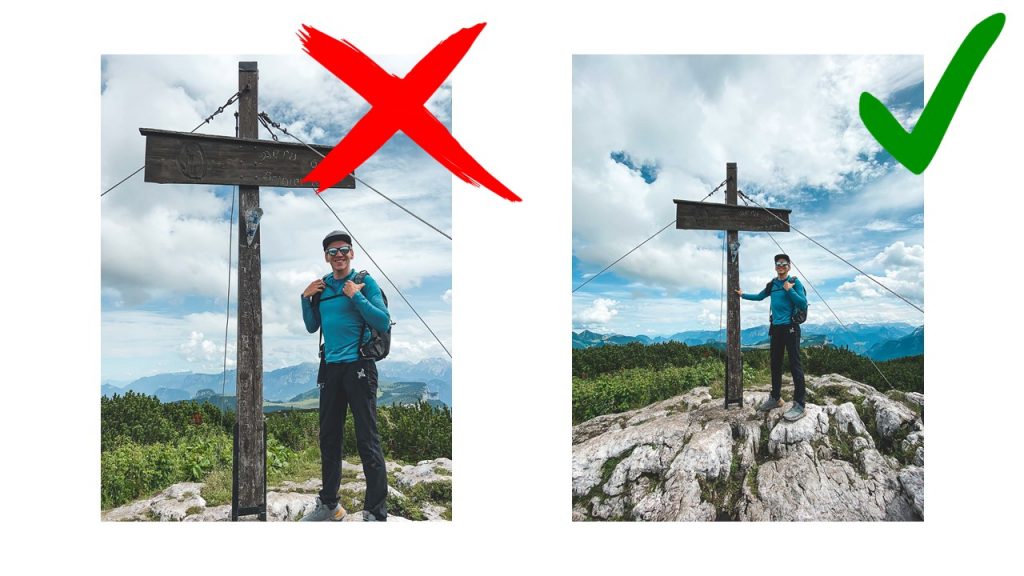
#4: DO NOT PLACE THE HORIZON IN THE CENTER
When you are creating landscape images, the horizon should not be in the center. People often tend to take pictures that are as symmetrical as possible. This may make sense for a lake with a reflection, but not if you want the lake or the view of the mountain peak to be the main focus. In this case, it makes sense to move the horizon to the upper third of the image to give the main subject more space.
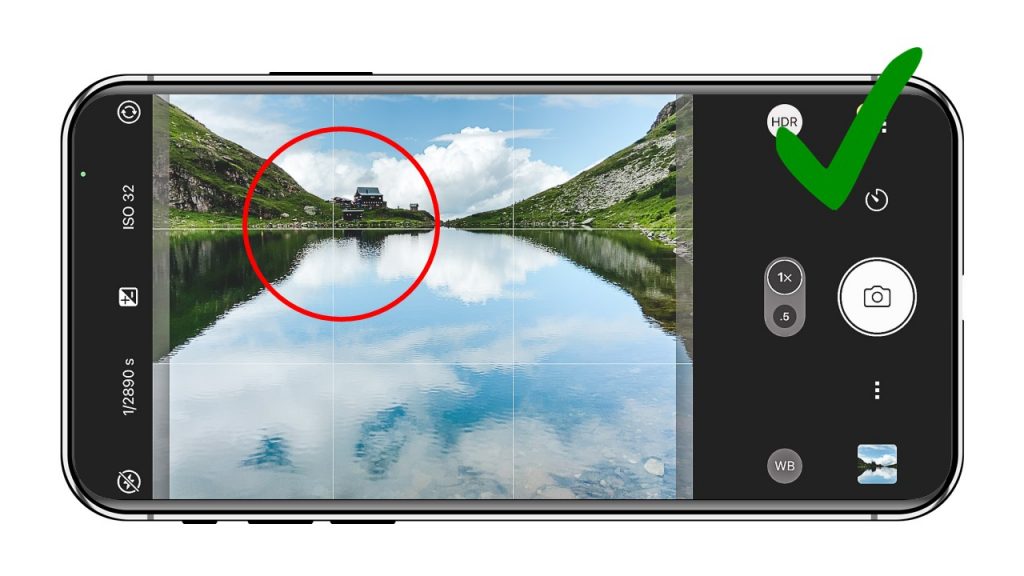
#5: OBSERVE THE GOLDEN SECTION
The previous tip also has something to do with the “golden ratio” or “rule of thirds”, which is one of the basics of image composition. If you are wondering where in the picture you should place the main subject (person, summit cross, flower, etc.), then mentally divide the picture into nine equal rectangles. You can also have these guides displayed in most camera apps. Do not simply place the main subject of your photo in the middle, but rather on one of the four intersections of the lines. This will make your photos look much better.
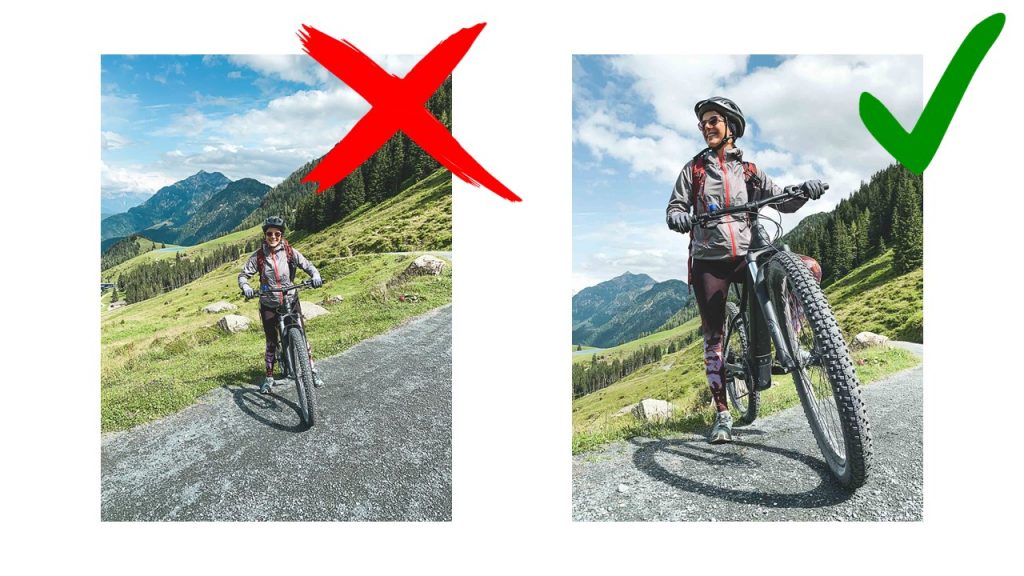
#6: CREATIVE PERSPECTIVE
Let your creativity run free. On hikes, you can play super with different perspectives, contrasts, or reflections. Just hike attentively and try your hand. You can even go a little lower to the ground to make the bike look cooler, use the little flower on the side of the path as a foreground or take a micro shot of a drop of water on the leaf.
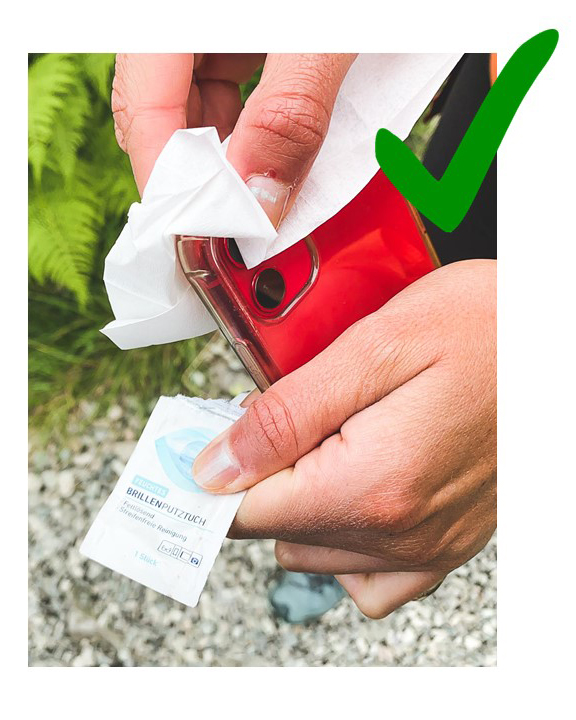
#7: CLEAN YOUR CELL PHONE LENS REGULARLY
This tip is very simple and yet very important. You will never get good pictures with a dirty cell phone lens. Clean your lens regularly with a lens cleaning cloth.
#8: ZOOMING WITH YOUR FEET
An absolute “no-go” when taking photos with most smartphones is zooming. Yes, you can easily zoom in on the desired subject with two fingers, but with most smartphones, this only works with a considerable loss of quality. That’s why it’s best not to use your fingers for zooming, but your feet, by simply stepping a few steps closer to the subject.
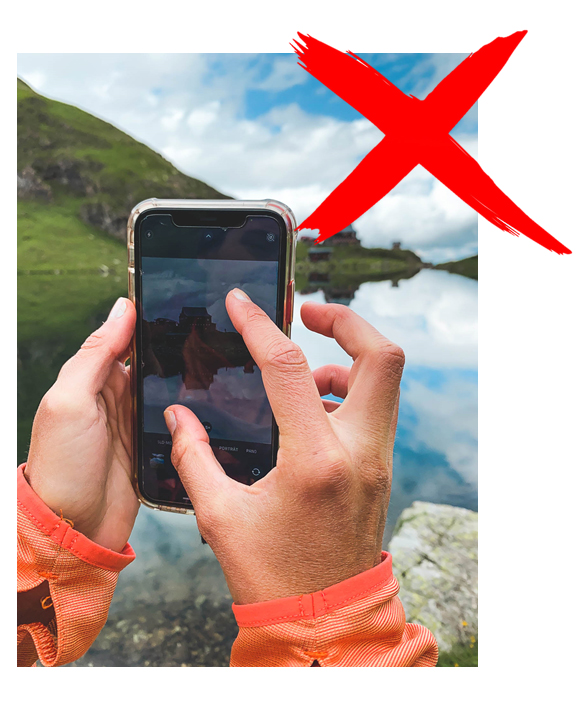
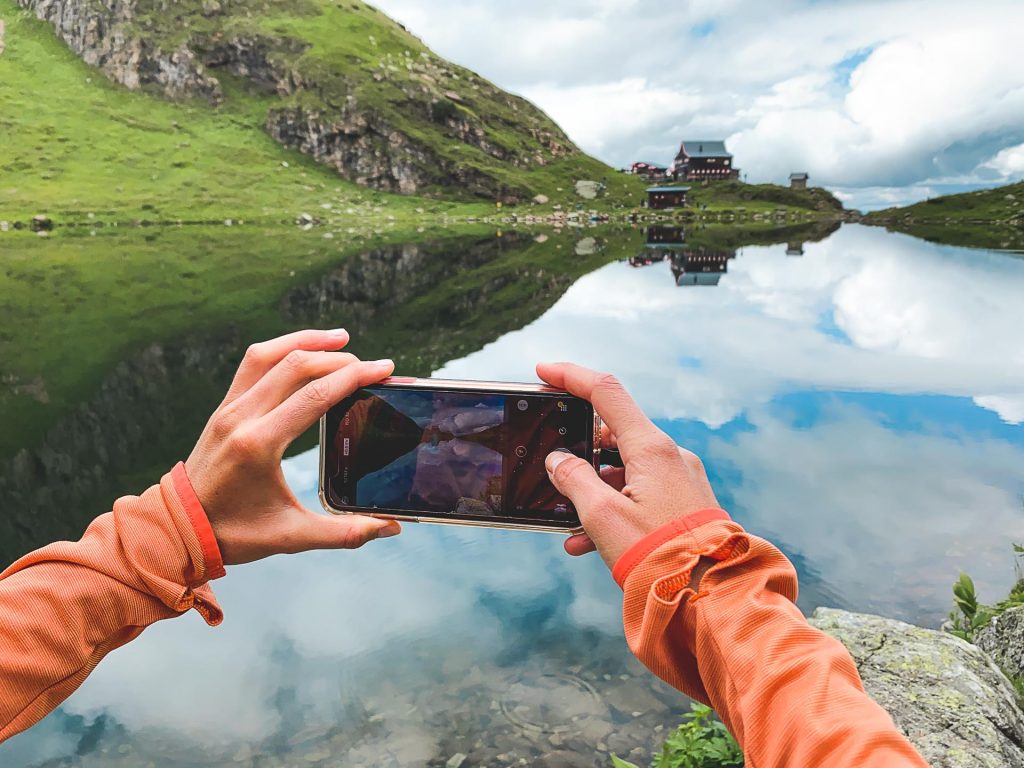
#9: ALWAYS USE TWO HANDS
Smartphones are great to use with one hand, but the picture will blur very quickly. Take your time when taking pictures, hold the smartphone with both hands and keep it as still as possible when taking the picture.
#10: PAY ATTENTION TO THE POSITION OF THE SUN
It’s best not to take pictures against the sun. Compared to normal cameras, smartphones can compensate for the difference between light and dark relatively well with the help of AI, but the picture is usually still not really beautiful. It is best to position the person or the main subject so that the sun shines on the side or from the front. Unfortunately, midday is never a good time to take beautiful pictures. Just after sunrise and just before sunset is the best light for photographers.
#11: AVOID UNFLATTERING ACCESSORIES
If you can’t avoid taking a picture at midday, we recommend that you make sure headpieces don’t completely obscure the face for people. Also, it can be beneficial to briefly open the hip belt of your backpack.
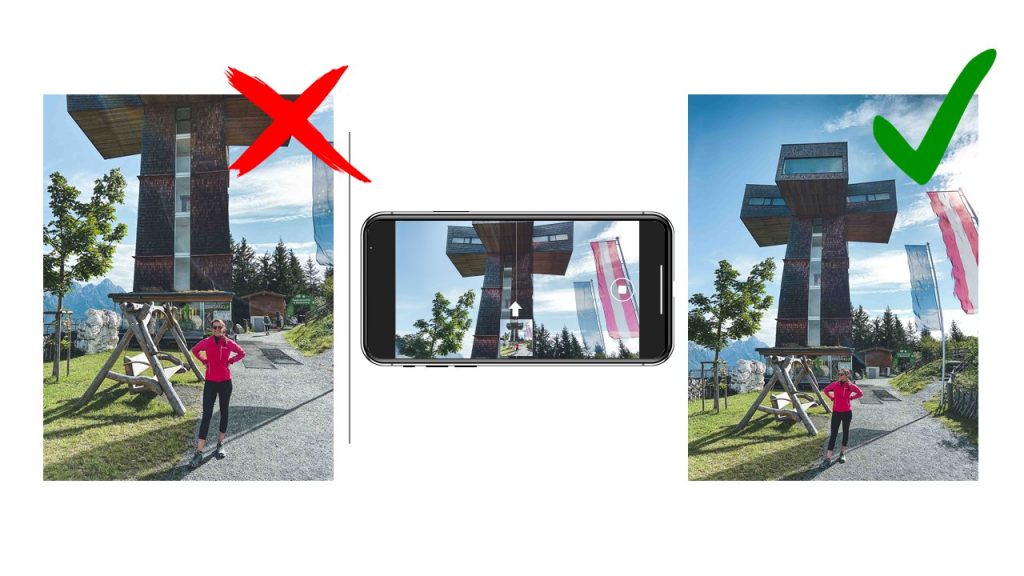
#12: USE WIDE-ANGLE LENS CORRECTLY
Especially on the summit, it is not always possible to simply take a few steps backward to position the summit cross well in the picture. Here it is worth using the wide-angle function, which many smartphones now have. But be careful: It’s best to place people and the summit cross in the center of the picture because the wide-angle effect distorts subjects at the edges.
#13: USE PANORAMA MODE
Most people use the panorama mode to create landscape images. However, you can also use this feature to take better pictures of tall subjects. Since the panorama function combines several images, the quality is better than with the wide-angle function.
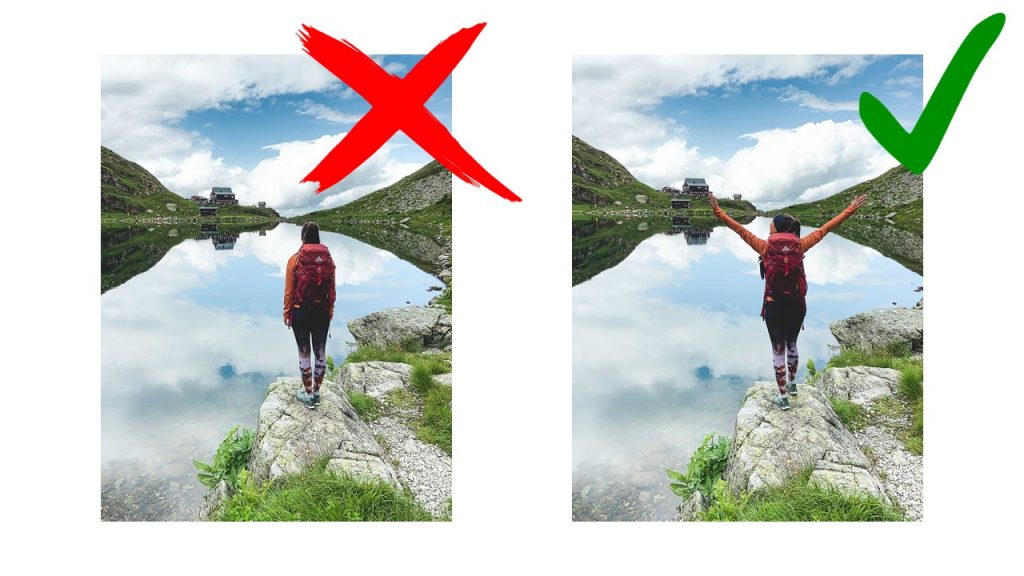
#14: HANDS UP
When taking beautiful summit pictures with one or more people, “posing” naturally also plays an important role. When asked “Where to put your hands?”, it is advisable not to simply let your hands hang. Tear your hands full of joy in the air or hold on to the backpack straps with them.
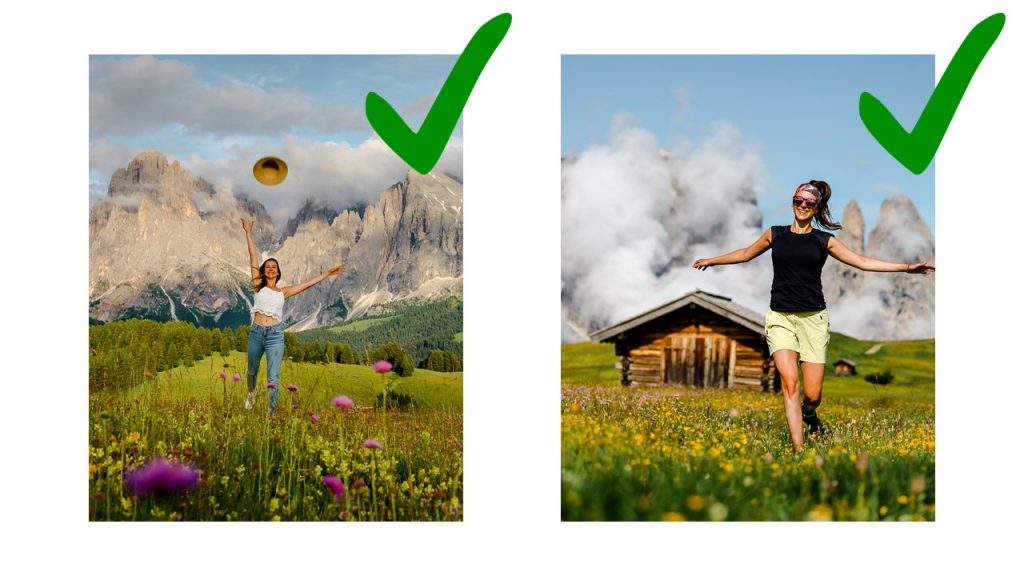
#15: BRING ACTION INTO YOUR PHOTOS
Action makes every mountain photo even more interesting. Instead of just standing next to the summit cross, you can also run or jump towards the camera, for example. Use continuous shooting to capture the best scene in action shots.
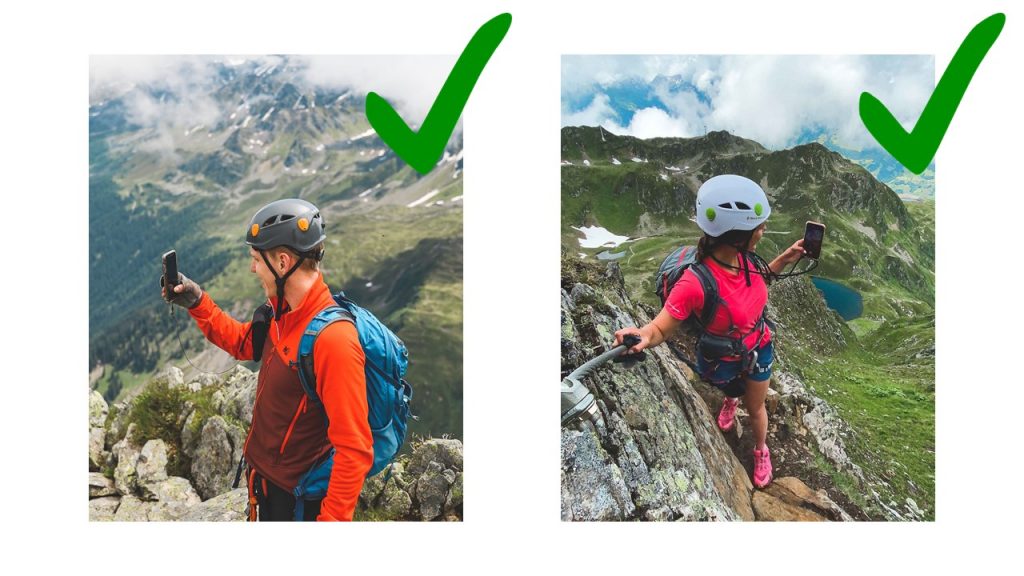
#16: SAFETY FIRST: USE ACCESSORIES TO PREVENT YOUR CELL PHONE FROM FALLING DOWN
Especially on challenging ridge walks or via Ferrata, it’s better to leave your cell phone in your backpack before it accidentally falls off. Here, either a cell phone chain or special cell phone safety devices (e.g. Reeloq) can provide a remedy.
#17: GLOVES WITH DISPLAY FUNCTION
Especially in winter, this tip is really worth its weight in gold. There are now many glove manufacturers who sew touch-sensitive material into the thumb and index finger. So even in winter you can relax and take a photo with your smartphone without getting cold hands.
#18: PRO TIP: SHOOT IN RAW FORMAT
With some smartphone cameras, you can switch to RAW format relatively easy. If not, it’s best to use another camera app (e.g. ProCamera in the AppStore or Open Camera in the PlayStore). The raw data format collects more image information and you can get more out of the image editing afterward.
#19: PROFESSIONAL TIP: IMAGE EDITING VIA APP
Most smartphone pictures with a “wow effect” are still edited afterward – we have to be that honest at this point. The good news is that it’s super fast and easy to edit images via the app. With the free Lightroom app, you can create your own filters or buy some. Other very good apps include VSCO or Snapseed.
#20: PROFESSIONAL TIP: SCOUTING LOCATIONS
If you’re really looking for the perfect mountain image on your next hike, it pays to do a little research beforehand. What’s the route of the hike? Where might there be beautiful vantage points? When is the sun at its best? For the selection of motifs, you can also get inspired on Instagram, for example. Use hashtags or locations to search for the next hike and let other photographers inspire you.
Behind the perfect mountain picture is not always a “quick snapshot”, but often a lot of attention to detail. If you take these tips into account on your next hike and simply try them out, you’ll be amazed at how professional your cell phone pictures suddenly look. We wish you lots of fun hiking and taking pictures ????